
Last Updated: October 27, 2026
Quick Summary
To document hidden water damage, first locate the moisture with tools like pin-type and pinless moisture meters, thermal imaging cameras, and hygrometers, then photograph each reading with the date and room visible. Log every reading on a moisture map, record a narrated video walkthrough, keep damaged items until the adjuster sees them, and save all receipts in one backed-up folder.
- Pin-type moisture meters return moisture content by weight and leave tiny holes you should photograph.
- Thermal cameras do not measure water; they point you to where to put the moisture meter.
- Photograph the thermal image and meter reading at the same spot so the evidence corroborates.
- Keep damaged items until the adjuster has seen them, and save every receipt.
- Trace and access coverage pays to locate a hidden leak and open the structure to reach it.
Table of Contents
- Start Your Hidden Water Damage Insurance Claim the Right Way
- Find the Hidden Water Damage Before You Document It
- Your Water Damage Documentation Checklist, Step by Step
- Photos for a Water Damage Insurance Claim That Adjusters Accept
- How to Write a Water Damage Report Adjusters Cannot Dismiss
- Hidden Water Damage Insurance Claim Traps: Trace and Access and Policy Limits
- Organize Your Evidence So Nothing Gets Lost
- Book a Free Claim Review Before You File
- Frequently Asked Questions
Start Your Hidden Water Damage Insurance Claim the Right Way
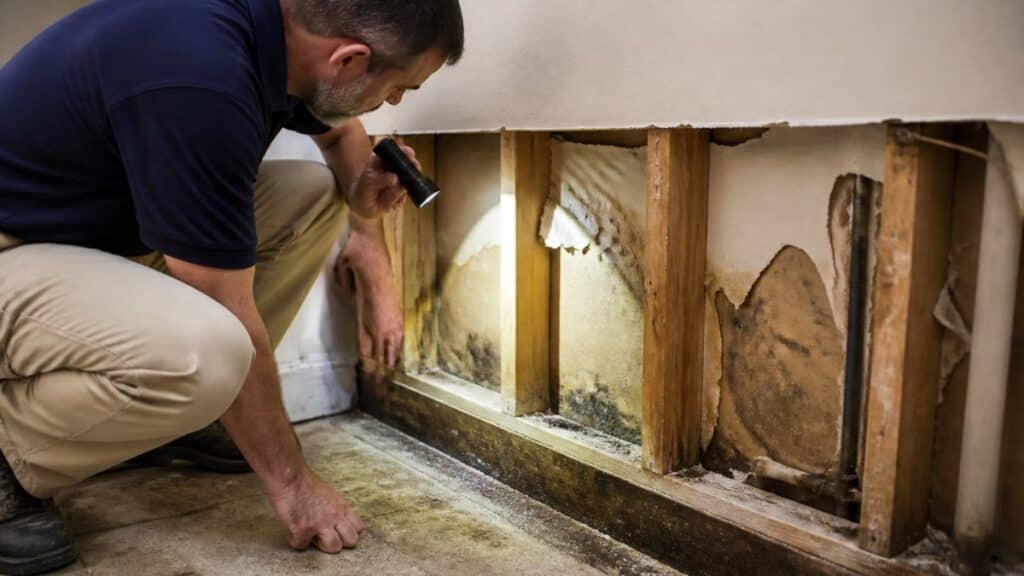
Hidden water damage is water intrusion you cannot see: moisture trapped behind drywall, under flooring, inside cabinets, or beneath a slab. It is the hardest damage to prove and the easiest for an insurer to dispute.
Your insurer does not pay for damage it cannot verify. A stained ceiling tells a story; a dated photo, a moisture reading, and a written log tell a case.
Below are eight steps, from finding the moisture to organizing the file.
Find the Hidden Water Damage Before You Document It
You cannot document what you have not located. Before you photograph anything, confirm where the water actually is. Hidden water damage usually announces itself in small ways: a musty smell, a soft spot near a baseboard, bubbling paint, or a utility bill that jumps without explanation.
Walk the property and check the usual suspects:
- Under sinks and behind toilets
- Around the water heater and supply lines
- Along baseboards and door frames
- Ceiling corners below bathrooms
- Flooring that feels spongy or cups at the seams
- The ice maker line behind the refrigerator and the washing machine supply hoses
- The attic decking below roof penetrations and around HVAC air handlers
Write down what you find and where. A simple log with the date, room, and description beats a memory every time.
Tools That Reveal What You Cannot See
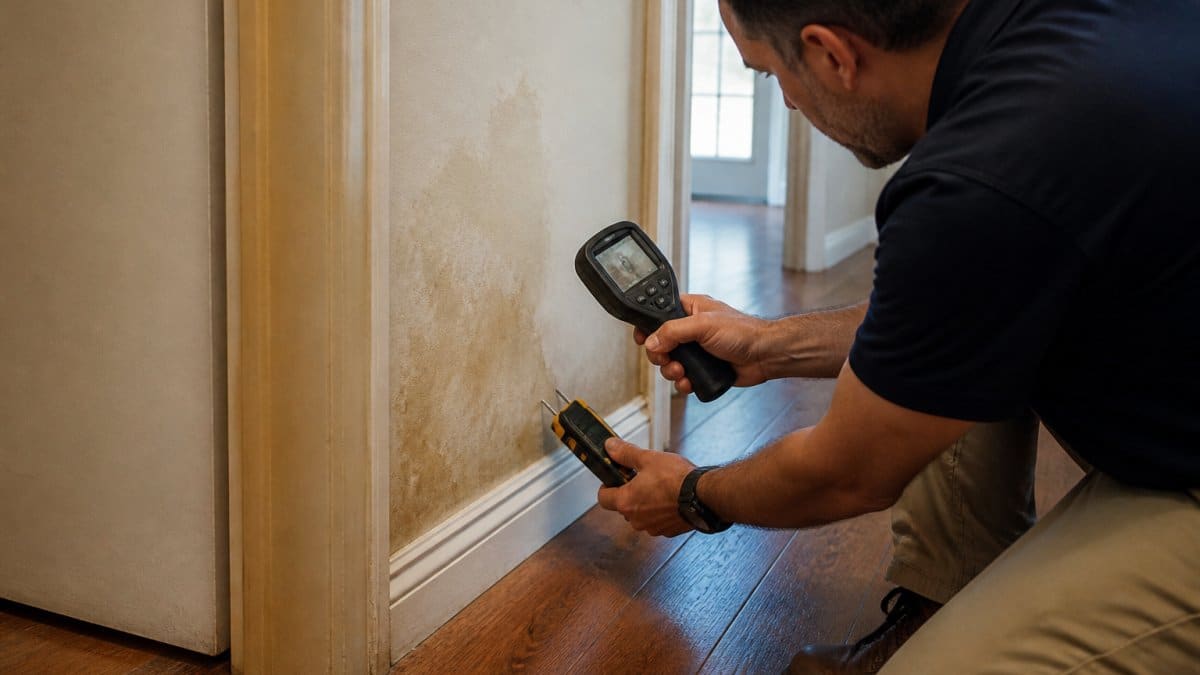
A few tools can help identify hidden moisture, and each produces a different kind of evidence. Use them together rather than relying on any single reading.
Pin-type moisture meters drive two metal pins into drywall, wood, or subfloor and return moisture content by weight. Pin meters leave tiny holes, so photograph the pinhole location before you move on.
Pinless (capacitive) moisture meters scan through tile, vinyl, and painted surfaces without penetrating them. They read relative density, not absolute water content.
Thermal imaging cameras show surface temperature differences. Thermal cameras do not measure water; they point you to where to put the moisture meter.
Hygrometers measure relative humidity in a room. A hygrometer measures relative humidity in a room.
Take a photo of each reading with the device screen visible and a slip of paper showing the date and room. That single habit turns a guess into evidence an adjuster can verify against your log.
Build a Moisture Map, Not Just a Photo Album
You can draw a simple floor plan of the affected rooms and mark every reading on it with a number, the device used, and the value, matching your photo filenames.
When to Stop DIY Detection and Call a Pro
Homeowner tools may not identify the source inside a slab or behind a tiled shower. Call a licensed plumber or restoration contractor when:
- A pin meter reads wet on a wall with no visible source
- The water bill rises with no fixture running (a common sign of a slab leak)
- You smell musty air in a room with no visible damage
- A thermal camera shows a cold streak running across a floor or ceiling
Ask the contractor for a written inspection report with readings, photos, and a stated cause.
Your Water Damage Documentation Checklist, Step by Step
Documentation is where most claims rise or fall. Work through these steps in order and keep everything in one folder.
- Stop the water. Shut off the supply and call a plumber. Note the date and time.
- Photograph before you move anything. Wide shots first, then close-ups.
- Record a video walkthrough. Narrate what you see and where.
- Log moisture readings. Write down each meter reading with its location.
- Keep damaged items. Do not throw out ruined materials until the adjuster has seen them.
- Save every receipt. Plumber, fan rental, hotel stay, storage. All of it.
- Start an incident timeline. First sign of damage, discovery, repairs, calls.
- Store copies off-site. Cloud backup or a second folder.
For a deeper walkthrough on collecting evidence that supports a claim, see our guide on how to document damage for insurance claims.
Work through these documentation steps in order and keep everything in one folder.
| Step | What to do |
|---|---|
| 1 | Stop the water; shut off supply, call a plumber, note date and time |
| 2 | Photograph before moving anything: wide shots first, then close-ups |
| 3 | Record a video walkthrough, narrating what you see and where |
| 4 | Log each moisture meter reading with its location |
| 5 | Keep damaged items until the adjuster has seen them |
| 6 | Save every receipt: plumber, fan rental, hotel, storage |
| 7 | Start an incident timeline: first sign, discovery, repairs, calls |
| 8 | Store copies off-site via cloud backup or a second folder |
Photos for a Water Damage Insurance Claim That Adjusters Accept
Photos can show scale, location, and cause. Pair a close-up of a water stain with a wider shot that shows the room and the source.
Shoot in this order:
- Wide shot of the room showing the damage in context
- Mid shot of the affected wall, ceiling, or floor
- Close-up of staining, bubbling, or warping
- Source shot of the leak point or failed pipe
- Reading shot of your moisture meter screen
Add a date and location note to each batch. Use good lighting, and avoid filters. A plain, honest photo set beats a dramatic one that looks edited.
Schedule your FREE Claim Consultation today →
How to Write a Water Damage Report Adjusters Cannot Dismiss
A water damage report can record the damage, its suspected cause, the date, and the estimated dollar impact. It does not need to be long, just clear, dated, and consistent with your photos.
What Goes Into the Report
- Property details: address, policy number, date of loss
- Cause: burst pipe, slow leak, appliance failure, storm intrusion
- Discovery: how and when you found it
- Affected areas: room by room, with square footage where you can
- Evidence index: photo numbers matched to each finding
- Repair estimates: contractor quotes and receipts
- Timeline: a dated list of events
Keep the language factual. Skip speculation about cost you cannot support. If a contractor gives you a written estimate, attach it rather than paraphrasing.
Hidden Water Damage Insurance Claim Traps: Trace and Access and Policy Limits
Two traps sink more hidden water damage claims than anything else: the trace and access clause and policy coverage limits. These are the exact provisions an adjuster reaches for when a hidden leak claim is disputed.
Trace and Access: Who Pays to Find the Leak
Trace and access coverage pays the cost of locating a hidden leak and opening the structure to reach it, cutting drywall, lifting flooring, or breaking into a slab. Homeowners assume the policy that pays to repair the pipe also pays to find it. Often it does not, or it pays under a separate, smaller limit.
Read your policy for these specific points:
- Is trace and access included, excluded, or capped? Some policies include it as an additional coverage with its own dollar limit; others exclude the cost of accessing the leak entirely and cover only the resulting water damage.
- Does the limit apply per occurrence or per policy term? A single slab leak can consume a small per-occurrence cap before any repair begins.
- Does the coverage require professional detection? Some carriers reimburse detection only when performed by a licensed contractor, not a homeowner with a meter.
- Is the access damage itself covered? The hole in the wall may be covered as part of the loss even when the search cost is not.
Check your policy for any trace-and-access terms that may apply to the cost of finding a leak.
Policy Limits and Sub-Limits That Quietly Cap Your Recovery
Review your policy for limits that may apply to hidden damage:
- Dwelling coverage limit, the cap on the structure itself. A slow leak that rots framing and subfloor can approach this faster than a single storm event.
- Mold sub-limits, mold that grows after a slow leak is frequently capped at a fraction of the dwelling limit, or handled under a separate endorsement. Document the mold separately and early.
- Ordinance or law coverage, if repairs must meet current building codes, review your policy for applicable coverage terms.
- Loss of use, Review your policy for any limits or documentation requirements for hotel and temporary housing costs.
Ask your adjuster, in writing, which limit each part of your claim is being applied against.
Notice Deadlines and the Duty to Mitigate
Review your policy for notice requirements and steps to prevent further damage. Document the damage before removing materials, when possible.
Photograph and log the damage before removing materials, when possible.
What to Do If the Adjuster Disputes the Cause
When an adjuster questions whether the damage is sudden or long-term, documentation may help explain what you observed. Review the policy and consider seeking professional guidance if the dispute continues.
If your claim has already been denied, our explanation of why insurance companies deny water damage claims covers the common reasons and how to challenge them.
Organize Your Evidence So Nothing Gets Lost
Build a documentation log that lists every photo, receipt, reading, and report with a date and a short note. Number your photos in the order you took them. Match each number to a line in your damage inventory.
A simple structure works:
- Folder 1: photos, sorted by room
- Folder 2: video walkthroughs
- Folder 3: receipts and contractor quotes
- Folder 4: moisture readings and inspection notes
- Folder 5: the written report and timeline
Back everything up to the cloud and keep a second copy on a drive.
Book a Free Claim Review Before You File
Before submitting a claim, review your documentation for missing photos, an incomplete timeline, or a cause you cannot yet support.
Barclays Public Adjusters has a No Recovery, No Fee policy. Barclays Public Adjusters provides expert evaluation, strategic documentation, and direct negotiation with insurance companies on behalf of clients. If you are weighing professional help, our guide on hiring a public adjuster for water damage explains how the process works. For homeowners ready to act now, you can request a water damage claim review in Boca Raton.
Frequently Asked Questions
Will insurance cover hidden water damage?
Coverage depends on the terms of your policy and the circumstances of the damage. Document when you first noticed the damage, review your policy’s limits and exclusions, and keep receipts for any mitigation work.
How do you document water damage that is behind a wall?
A moisture meter or thermal imaging camera may help identify areas to investigate. Document what you observe and consider consulting a qualified professional about further inspection. Keep records of any findings and work performed.
What photos should you take for a water damage insurance claim?
Take wide shots of each room, followed by mid-range and close-up shots of visible damage. You can also photograph the apparent source and any damaged personal property. Keep copies of your photos and video.
Should you wait for an insurance adjuster before making repairs?
Review your policy for any requirements to protect the property and notify your insurer. Document the damage and any steps you take, and keep receipts for related work. If there is active water intrusion, consider contacting an appropriate professional promptly.
Hidden water damage rarely waits, and neither should your documentation. The longer a leak sits, the more the evidence fades and the harder the claim becomes to prove. Barclays Public Adjusters brings licensed adjusters, a documentation-first process, and direct negotiation with your carrier, all under a No Recovery, No Fee policy. Get started with Barclays Public Adjusters and put your claim on solid evidence before you file.
